September 18, 2006

#27 - Buying a Parts Trailer

Today I acquired a second 1956 Airstream Caravanner. A tree fell on it in the middle of its restoration, so the owner was selling it for parts.


My Second 1956 Caravanner

It's in rough shape...gutted...but all the original cabinetry and appliances come with it. Remember I don't have any original cabinetry or appliances from #1.

I wasn't looking for a second trailer. But this one sort of fell out of the sky. How can I say "no" to a parts trailer?

Honestly, it's a bit of a moral dilemna for me since I hate to see any 1950s Airstreams taken off the road. I'm going to have to meditate on how best to proceed from here.

Rob Baker of Sweet Sovereign fame is retrieving the trailer for me the first week of October. Thanks, Rob.

September 12, 2006

#26 - Restored Tongue

Here you can see the great job Colin's crew did on the coupler. Remember the frame was so bad in this spot that he had to cut it off and weld new steel on first. Then they cleaned up the old coupler and welded it back on.

Look at Post #5 to see what it used to look like.


New Tongue Framing


Restored Coupler

One thing missing in the photo above is a jack for the tongue. I could have reused the original, but they're so inexpensive that it's better to just replace it with a new one. I'm using a Fulton top wind A-frame jack. It looks a lot like the original.


Fulton Jack

In all the restored chassis photos you can see the fresh paint. All the chassis' old steel is painted with POR-15, a rust-neutralizing paint.

Regular Rust-o-leum is used on the new steel. Any areas that will be visible or receive UV exposure will be painted again later with silver Rust-o-leum.

September 06, 2006

#25 - Spare Tire Carrier

Some people put it on the back bumper. I've never liked that because it takes away from the streamlined look. Also, it gets in the way if you have a storage compartment bumper.

Some people put it behind the propane tanks. I did that with my '67 Caravel, but it looked like clutter to me. Plus, the Caravanner has a battery (or storage) box up front so there's no room.

For one or two model years, Airstream created a wide storage compartment on the side. You slide it in from the outside and it rests in one of your base cabinets. Cool, but cabinet space is precious.


In my book, there's only one place to put the spare: under the trailer. It's a little tricky. You can see in the photo above that it requires another chassis modification near the front in the A frame section.

Having it underneath does mean getting under the trailer when you have a blowout, but it's in the front area so the clearance will always be good. The belly skin in this area will wrap up around the framing and directly up against the floor so there will be no room for insulation. The other disadvantage to this method is that the tire hangs down 5" below the plane of the belly skin. That bothers me a little, but we may mitigate part of that problem by raising the trailer an inch or so with the new axle.


Shown With Tire in Place

#24 - Adding a Gray Tank

Old trailers had waste (black water) tanks under the toilet, but no wash water (gray water) tanks. The wash water just dumped straight on the ground. Today, it's illegal to do that in most states, and very few campgrounds would put up with you if you tried it. New trailers all have separate gray tanks.

Below you can see the frame modification we made to accomodate a big gray tank under the floor. It will sit between the wheels. The space is 50" X 35" X 3 3/4". That equals 6532 cubic inches, or room for a 28 gallon gray tank. For comparison, new Airstream trailers up through 23-ft long have 21 gallon gray tanks and black tanks of 18 to 21 gallons. They have fresh water tanks as big as 30 gallons.


Frame Rung Moved Forward

September 01, 2006

#23 - Frame Repair

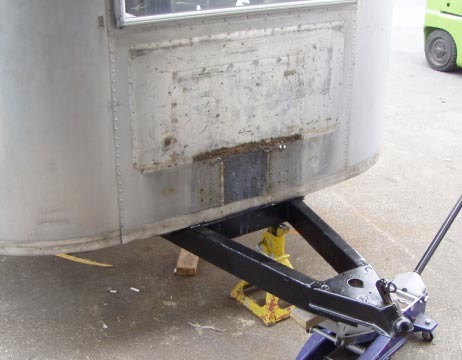
Now that the frame repairs are underway, we can see additional fixes that will be needed. Thankfully, most all the outriggers are in good shape and can be reused. However, the rungs on the ladder frame were pretty bad. Several were replaced.


New Rungs Among the Old

As we planned, the back 1/3 of the frame was just cut off and replaced as a whole.


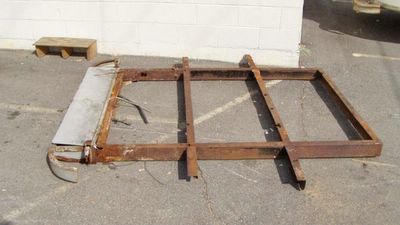
Back End of Chasis Frame.

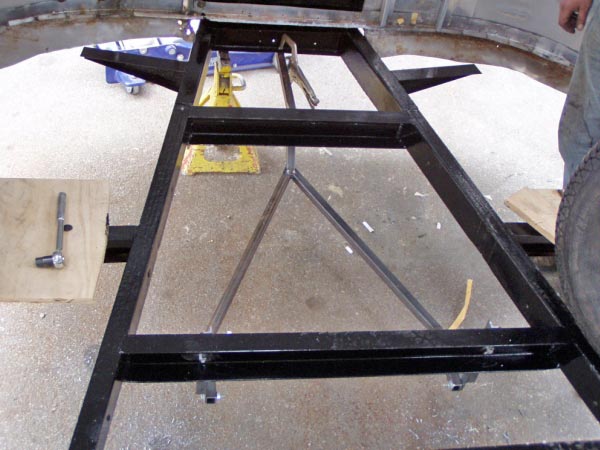
One of the innovative techniques Colin's shop uses to strengthen old frames is to slide new 1.5" x 3" x .125" thick box channel inside the old 2" x 4" x .100" thick frame rails and then plug weld them in place. This strengthens the entire frame and acts as a great splint between welded-together sections. Because the old frame rails take a turn to form the A frame towards the tongue, Colin slides rails in from both the front and the back.

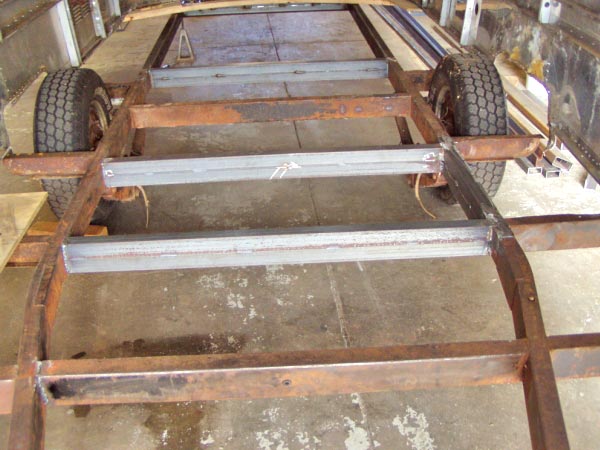
You can see in the photo below how they have used short pieces of steel bar to block the smaller inside channel in place. Normally, they don't use rebar, but it worked well here in the tongue. Normally, they drill a few holes on one side of the old channel and then put bolts through to push the new inner channel all the way to one side of the old channel. They drill more holes on the other side and plug weld through the holes where the two channels are touching. This locks the box channel in place permanently.

When finished, the frame is stronger than it was originally. It will be somewhat heavier, too, but Colin assures me he won't do anything that will prevent me from staying under 3000 pounds dry weight. (Right, Colin?)


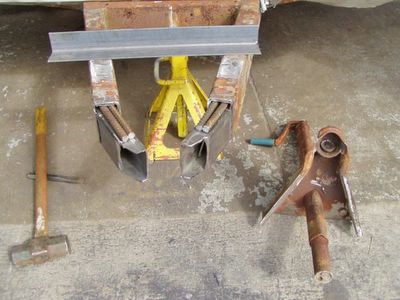
Support Inside Framing. Original Coupler on Ground.