I'm too busy right now to do much on my Caravanner project. Big changes are happening at my company, Vintage Trailer Supply. In January, we're moving to a new facility, dramatically upgrading our technology (again), adding even more new items, and then hiring more help. Although I'm excited to grow and improve customer service for our super-loyal customers, the investments keep money and time very tight.
In January, I hope to spend many hours polishing and rebuilding all my window frames. All the windows have been removed from the trailer. They were riveted in at the factory, so all the rivets--hundreds of them--had to be drilled out. The trailer is left with rough openings where the windows were. They're covered with plastic for the winter. The windows are in my basement waiting for me to get to work.
December 23, 2006
December 06, 2006
#37 - Finishing the Floor
Today's project was to finish installing the floor and then securely attach the shell to the floor.
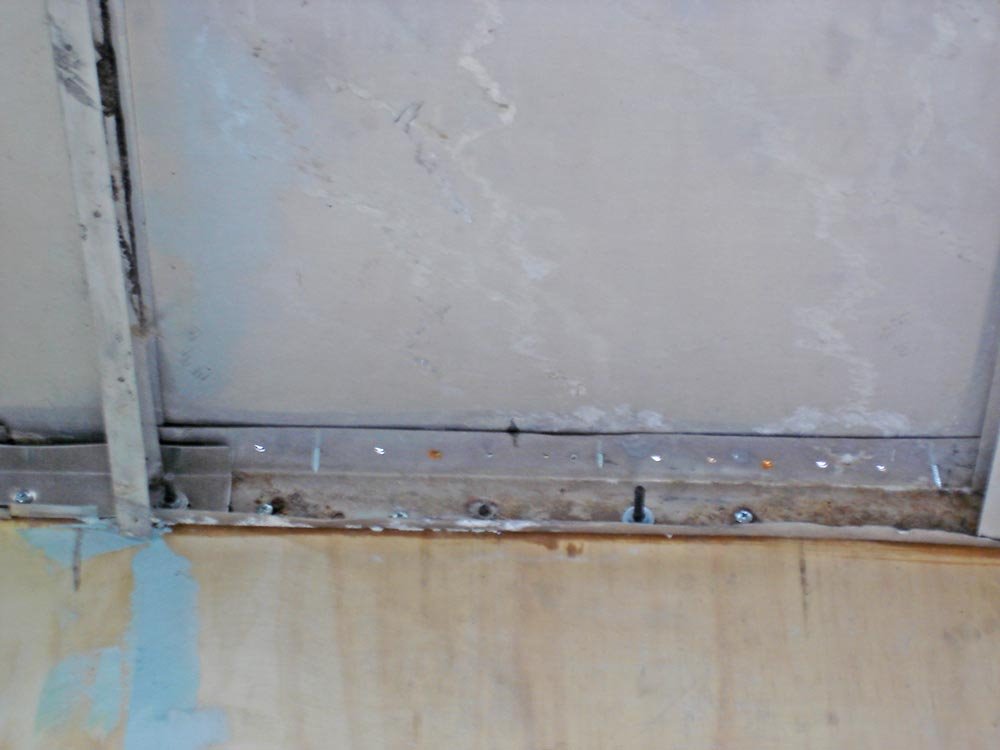
For an Airstream to be structurally sound, the floor must be solid. But I'm not talking about the part of the floor you walk on. I'm talking about the part of the floor under the walls.
When an Airstream is built, the plywood is installed first and the shell is put on top. So when the plywood around the edges softens and disintegrates, it leaves a 5/8" gap between the bottom of the wall and the top of the chassis! To make matters worse, Wally's crews usually screwed the bottom of the wall into the plywood, but not all the way through the plywood and then into the chassis. So if your floor is soft under the walls, you have NOTHING holding the shell to the chassis in the area of the weak floor!
The shell must be bolted or screwed through solid floor and into the chassis. That's why floor repair is so hard on an Airstream...and is so often done insufficiently. Floor repair shortcuts that put new pieces of floor up to the wall, but not under it, may give you a firm floor, but they will not fix the underlying problem of a shell and chassis that are not fully secured.

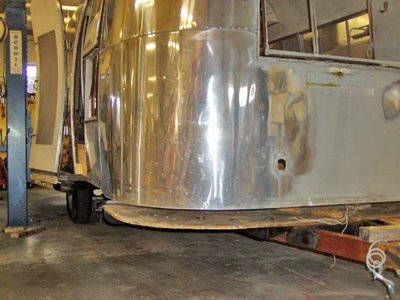
Before the plywood and chassis are fastened securely together, the chassis will have a tendency to sag at the rear end. Working on a solid level surface and using temporary jacks to hold everything straight is essential until the floor is fully fastened down. Notice, also, the extra long chassis rails. Caravanner #1 came with a 1960s-style trunk bumper for the sewer hose rather than a simple 1950s bumper. I'm going to replicate that feature.

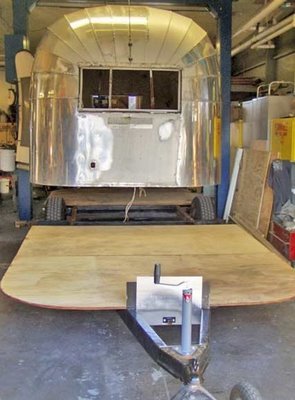
The photo above shows the new plywood floor spanning the restored chassis. For extra stability, construction adhesive is used where the floor touches the chassis. Back in the day, Wally's crews layed fiberglass insulation across the chassis before the plywood was layed. We aren't doing it that way. We'll be insulating from below before the belly pan is closed up.

Notice the odd plywood seam pattern above. The edges of each piece of plywood need to all end up on frame members so they are supported. My chassis is modified to create a trapezoidal spare tire storage area under the floor. You can see it in post #25. This is also a good shot of how all plywood edges (and all undersides) are treated with wood preservative.

The fasteners of choice for the floor are elevator bolts and countersunk self-tapping machine screws. The elevator bolts are great because their wide flat heads are easy to countersink and could never pull through the plywood. They're secured with a hex nut underneath. The special self-tapping machine screws are almost as good. They have threads like bolts. They're used only where it would be impossible to reach the bottom end of a bolt to put on a hex nut. With the screws, the frame member is tapped so it acts like a nut and holds great. In a case like his, they aren't used much. But if you are doing a floor repair without removing the belly pan, they're your best friend.

The shell has a U-channel inside the bottom edge of the wall all the way around. It's what secures the bottoms of the inner and outer skins of the trailer. Remove the lower segments of inner skin to get access to the U-channel. Screws and bolts are used to hold the U-channel to the floor and chassis. Here you can see the nuts on the ends of elevator bolts that were inserted through outriggers from below and then up through the channel. Sometimes, they go the other way. It doesn't much matter what fasteners you use here since they are hidden, but they should hold tight to the chassis as much as possible.
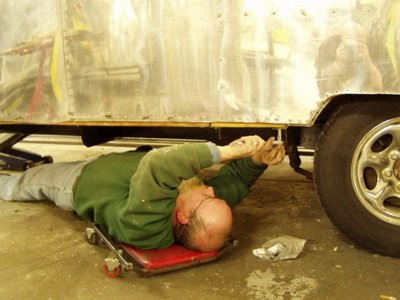
It can be tricky to get the nut on the bolt underneath. It's a two-person job. Above, Joe holds the socket wrench while Chris is working the top side.
For an Airstream to be structurally sound, the floor must be solid. But I'm not talking about the part of the floor you walk on. I'm talking about the part of the floor under the walls.
When an Airstream is built, the plywood is installed first and the shell is put on top. So when the plywood around the edges softens and disintegrates, it leaves a 5/8" gap between the bottom of the wall and the top of the chassis! To make matters worse, Wally's crews usually screwed the bottom of the wall into the plywood, but not all the way through the plywood and then into the chassis. So if your floor is soft under the walls, you have NOTHING holding the shell to the chassis in the area of the weak floor!
The shell must be bolted or screwed through solid floor and into the chassis. That's why floor repair is so hard on an Airstream...and is so often done insufficiently. Floor repair shortcuts that put new pieces of floor up to the wall, but not under it, may give you a firm floor, but they will not fix the underlying problem of a shell and chassis that are not fully secured.

Before the plywood and chassis are fastened securely together, the chassis will have a tendency to sag at the rear end. Working on a solid level surface and using temporary jacks to hold everything straight is essential until the floor is fully fastened down. Notice, also, the extra long chassis rails. Caravanner #1 came with a 1960s-style trunk bumper for the sewer hose rather than a simple 1950s bumper. I'm going to replicate that feature.
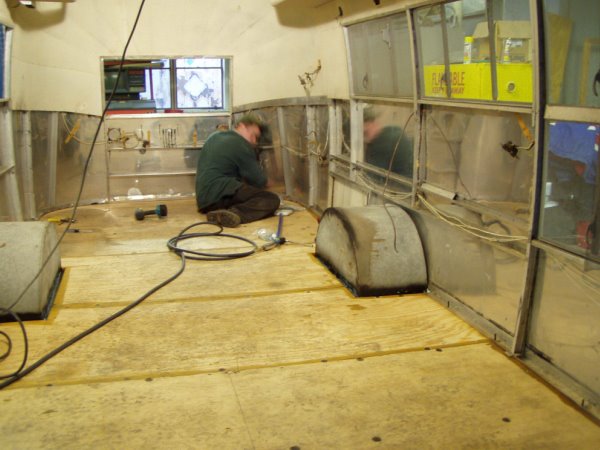
The photo above shows the new plywood floor spanning the restored chassis. For extra stability, construction adhesive is used where the floor touches the chassis. Back in the day, Wally's crews layed fiberglass insulation across the chassis before the plywood was layed. We aren't doing it that way. We'll be insulating from below before the belly pan is closed up.

Notice the odd plywood seam pattern above. The edges of each piece of plywood need to all end up on frame members so they are supported. My chassis is modified to create a trapezoidal spare tire storage area under the floor. You can see it in post #25. This is also a good shot of how all plywood edges (and all undersides) are treated with wood preservative.
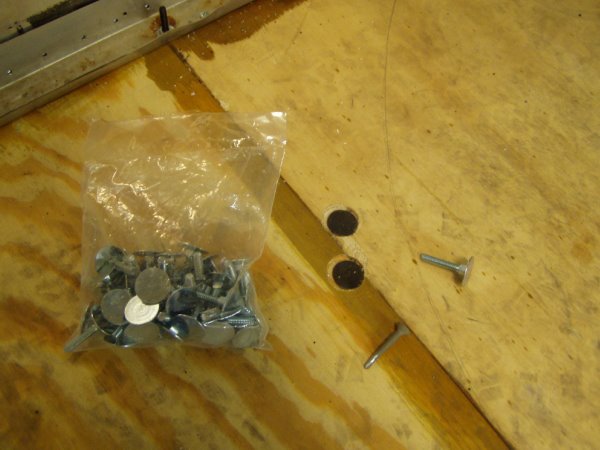
The fasteners of choice for the floor are elevator bolts and countersunk self-tapping machine screws. The elevator bolts are great because their wide flat heads are easy to countersink and could never pull through the plywood. They're secured with a hex nut underneath. The special self-tapping machine screws are almost as good. They have threads like bolts. They're used only where it would be impossible to reach the bottom end of a bolt to put on a hex nut. With the screws, the frame member is tapped so it acts like a nut and holds great. In a case like his, they aren't used much. But if you are doing a floor repair without removing the belly pan, they're your best friend.
The shell has a U-channel inside the bottom edge of the wall all the way around. It's what secures the bottoms of the inner and outer skins of the trailer. Remove the lower segments of inner skin to get access to the U-channel. Screws and bolts are used to hold the U-channel to the floor and chassis. Here you can see the nuts on the ends of elevator bolts that were inserted through outriggers from below and then up through the channel. Sometimes, they go the other way. It doesn't much matter what fasteners you use here since they are hidden, but they should hold tight to the chassis as much as possible.

It can be tricky to get the nut on the bolt underneath. It's a two-person job. Above, Joe holds the socket wrench while Chris is working the top side.
December 04, 2006
#36 - Swapping Shells
Here's something you'll probably never see again: Today, Colin's crew swapped the shells and chassis from two identical vintage Airstreams.
The ordeal was necessary because my #1 1956 Caravanner has a beautifully restored and customized chassis and my #2 1956 Caravanner has a much better shell. By marrying the #1 chassis and #2 shell, we'll get the best of both trailers. The photos below will show the general steps they followed.
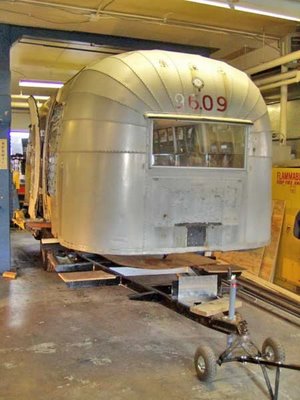
First, Caravanner #1 was brought inside the shop...
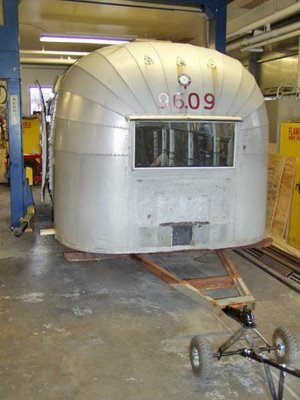
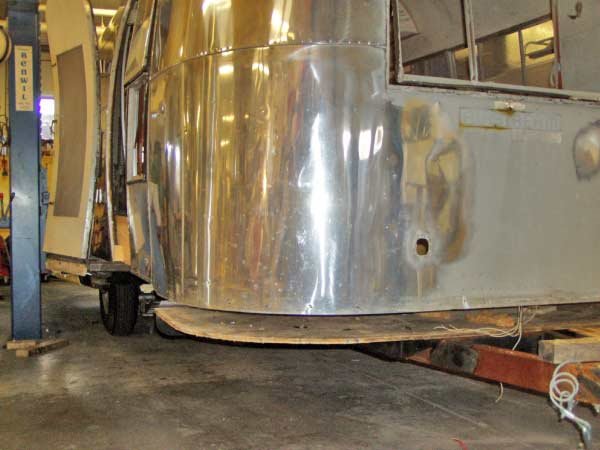
 The shell of #1 is separated from its chassis and lifted high enough to clear the wheel wells.
 The good #1 chassis is pulled out from under its shell and set aside for the time being.
 Next, a spare old rusty chassis is pushed underneath. This one just happens to have belonged to movie star Matthew McConaughey. Colin's crew is working on Matthew's trailer simultaneously, and they built him a brand new chassis rather than restoring his original.
 Shell #1 is set down on Matthew's old chassis and minimally fastened so it doesn't fall off. They will be towed off to the back part of the lot where they will be used for parts for my trailer and others.
Now Caravanner #2 is brought inside...
 The #2 shell and chassis are separated.
 With the shell up in the air, the #2 chassis is pulled out from underneath. That #2 chassis is set aside for now. I will try to find a loving home for it since it is in restorable condition.
 Here, my restored chassis from #1 is brought back in the shop and pushed underneath the #2 shell.
 Finally, the #2 shell is carefully lowered down on the #1 chassis. Fortunately, it fits! With each 50s Airstreams being somewhat unique in construction, we couldn't be 100% sure until the moment of completion.
The next step will be to finish installing the plywood floor and then secure the #2 shell to it's "new" chassis.
The ordeal was necessary because my #1 1956 Caravanner has a beautifully restored and customized chassis and my #2 1956 Caravanner has a much better shell. By marrying the #1 chassis and #2 shell, we'll get the best of both trailers. The photos below will show the general steps they followed.
First, Caravanner #1 was brought inside the shop...
 The shell of #1 is separated from its chassis and lifted high enough to clear the wheel wells.
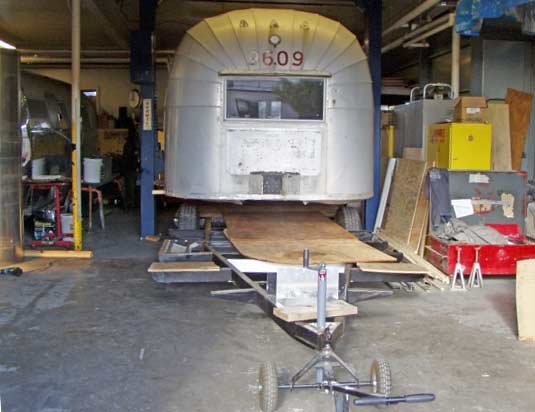 The good #1 chassis is pulled out from under its shell and set aside for the time being.
 Next, a spare old rusty chassis is pushed underneath. This one just happens to have belonged to movie star Matthew McConaughey. Colin's crew is working on Matthew's trailer simultaneously, and they built him a brand new chassis rather than restoring his original.
 Shell #1 is set down on Matthew's old chassis and minimally fastened so it doesn't fall off. They will be towed off to the back part of the lot where they will be used for parts for my trailer and others.
Now Caravanner #2 is brought inside...
 The #2 shell and chassis are separated.
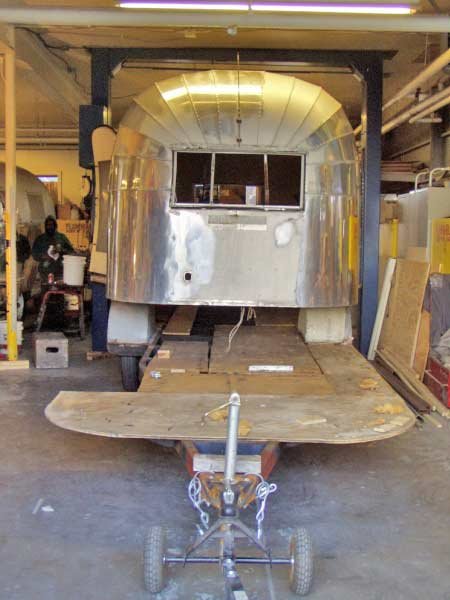 With the shell up in the air, the #2 chassis is pulled out from underneath. That #2 chassis is set aside for now. I will try to find a loving home for it since it is in restorable condition.
 Here, my restored chassis from #1 is brought back in the shop and pushed underneath the #2 shell.
 Finally, the #2 shell is carefully lowered down on the #1 chassis. Fortunately, it fits! With each 50s Airstreams being somewhat unique in construction, we couldn't be 100% sure until the moment of completion.
The next step will be to finish installing the plywood floor and then secure the #2 shell to it's "new" chassis.
December 03, 2006
#35 - Mexican Caravan
My #1 Caravanner came with a wonderful bumpersticker on its rusty bumper. It was a very old sticker from a campground in Oaxaca, Mexico.
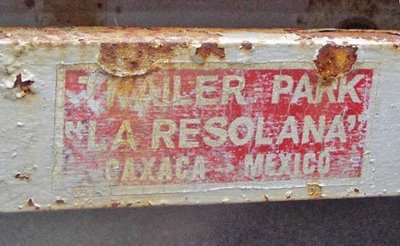
That tantalizing peek into my trailer's history is especially interesting since Wally Byam Caravans led a big caravan to Mexico--including Oaxaca--in 1956.

That tantalizing peek into my trailer's history is especially interesting since Wally Byam Caravans led a big caravan to Mexico--including Oaxaca--in 1956.
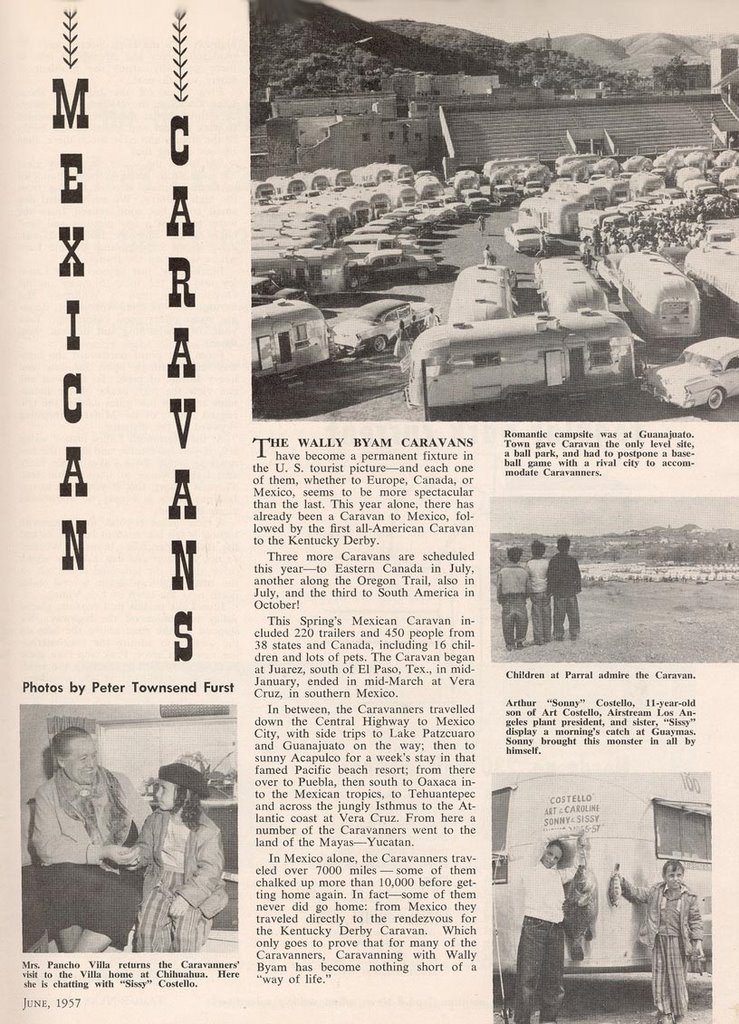
I wish I knew more of the story.
December 01, 2006
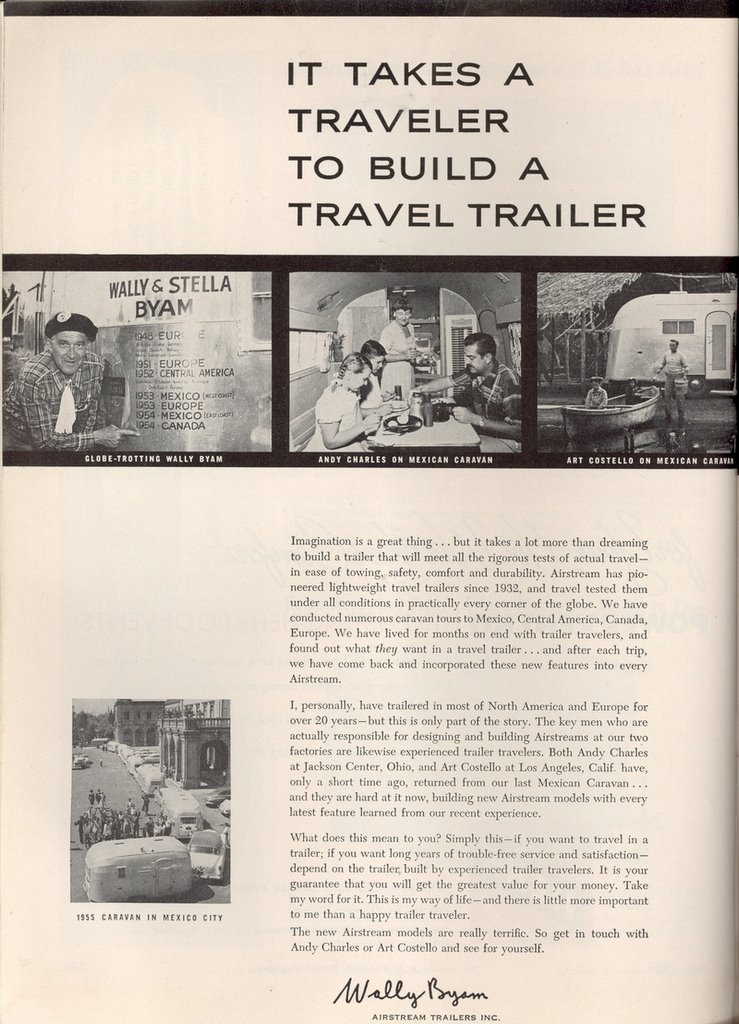
#34 - Wally Byam's Style
Vintage Airstream owners keep Wally Byam's legacy alive. But what is it that matters about Wally, now decades after his death? Someday, I'd like to read or write a good biography of Wally. Perhaps we know less than half the story.
No matter who Wally really was, we do know he was a master at public relations and marketing. He reminds me a little of Richard Branson of Virgin Inc. Like Sir Richard, Wally used his personality and his own lifestyle to promote his products and create a buzz and cool-factor that translated into sales of his travel trailers. But even more than an ingenious marketer, Wally seems to have been authentically committed to promoting a life of travel and adventure for all Americans. In his books, he pushes his readers to get out of the rocking chair and travel.
Here's a great ad from right around 1956 that demonstrates the way he wove together marketing and adventure. You might have to click on it more than once to make it the big enough to read.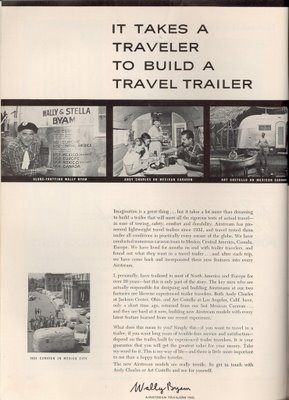
Subscribe to:
Posts (Atom)
