I'm too busy right now to do much on my Caravanner project. Big changes are happening at my company, Vintage Trailer Supply. In January, we're moving to a new facility, dramatically upgrading our technology (again), adding even more new items, and then hiring more help. Although I'm excited to grow and improve customer service for our super-loyal customers, the investments keep money and time very tight.
In January, I hope to spend many hours polishing and rebuilding all my window frames. All the windows have been removed from the trailer. They were riveted in at the factory, so all the rivets--hundreds of them--had to be drilled out. The trailer is left with rough openings where the windows were. They're covered with plastic for the winter. The windows are in my basement waiting for me to get to work.
December 23, 2006
December 06, 2006
#37 - Finishing the Floor
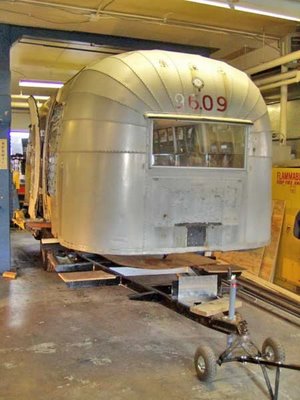
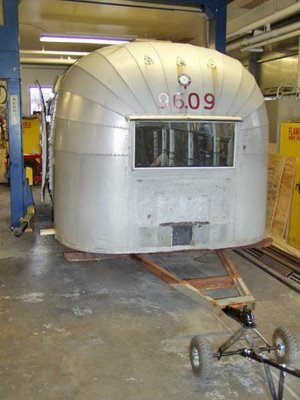
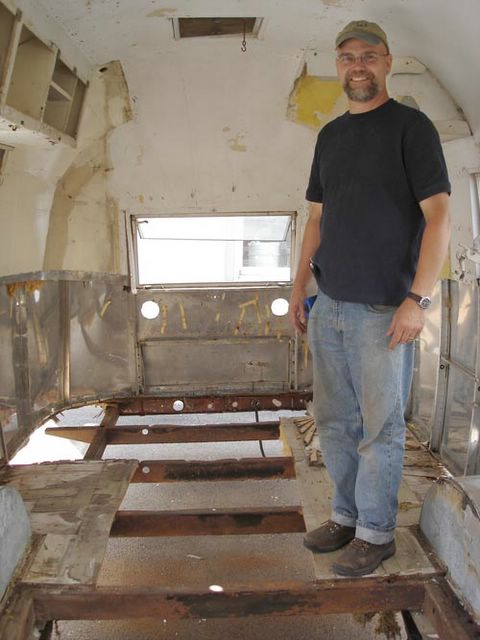
Today's project was to finish installing the floor and then securely attach the shell to the floor.
For an Airstream to be structurally sound, the floor must be solid. But I'm not talking about the part of the floor you walk on. I'm talking about the part of the floor under the walls.
When an Airstream is built, the plywood is installed first and the shell is put on top. So when the plywood around the edges softens and disintegrates, it leaves a 5/8" gap between the bottom of the wall and the top of the chassis! To make matters worse, Wally's crews usually screwed the bottom of the wall into the plywood, but not all the way through the plywood and then into the chassis. So if your floor is soft under the walls, you have NOTHING holding the shell to the chassis in the area of the weak floor!
The shell must be bolted or screwed through solid floor and into the chassis. That's why floor repair is so hard on an Airstream...and is so often done insufficiently. Floor repair shortcuts that put new pieces of floor up to the wall, but not under it, may give you a firm floor, but they will not fix the underlying problem of a shell and chassis that are not fully secured.

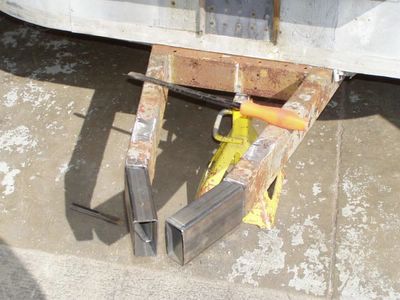
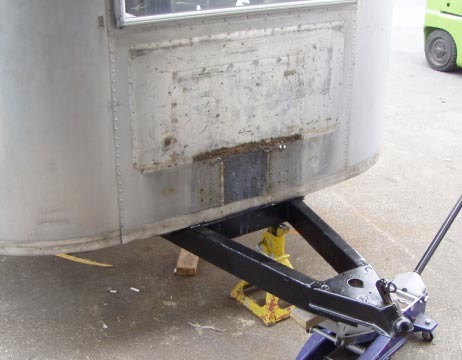
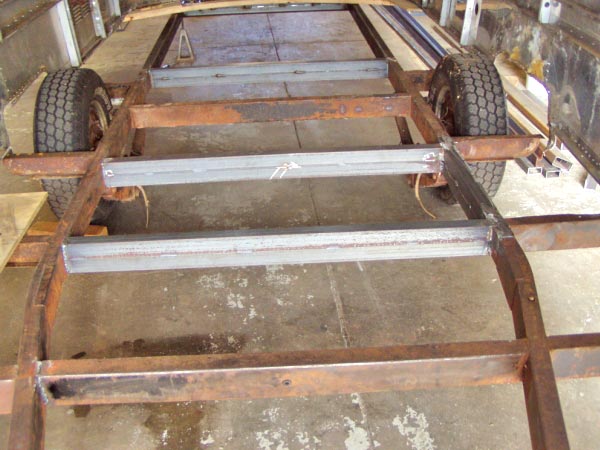
Before the plywood and chassis are fastened securely together, the chassis will have a tendency to sag at the rear end. Working on a solid level surface and using temporary jacks to hold everything straight is essential until the floor is fully fastened down. Notice, also, the extra long chassis rails. Caravanner #1 came with a 1960s-style trunk bumper for the sewer hose rather than a simple 1950s bumper. I'm going to replicate that feature.

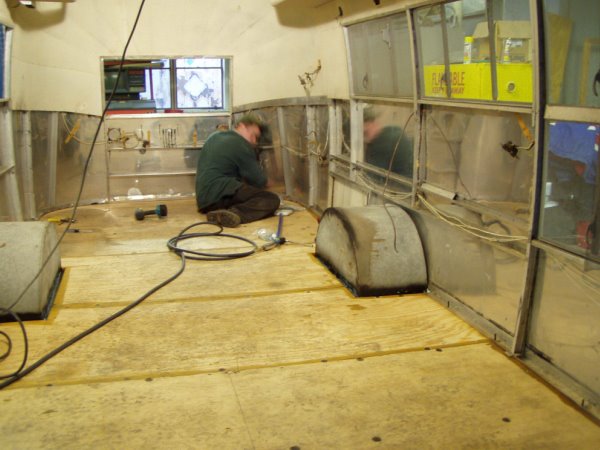
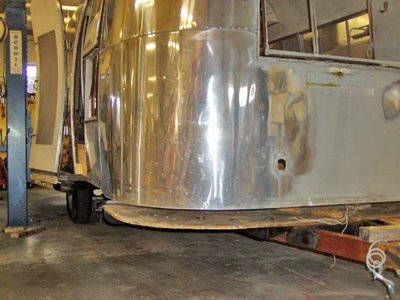
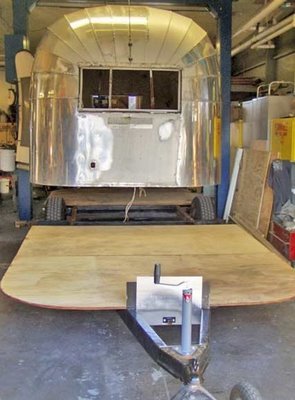
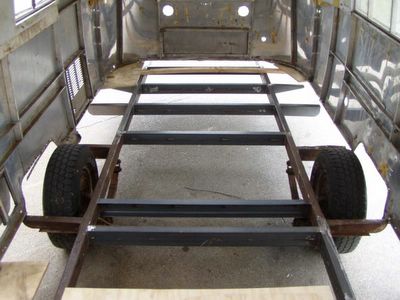
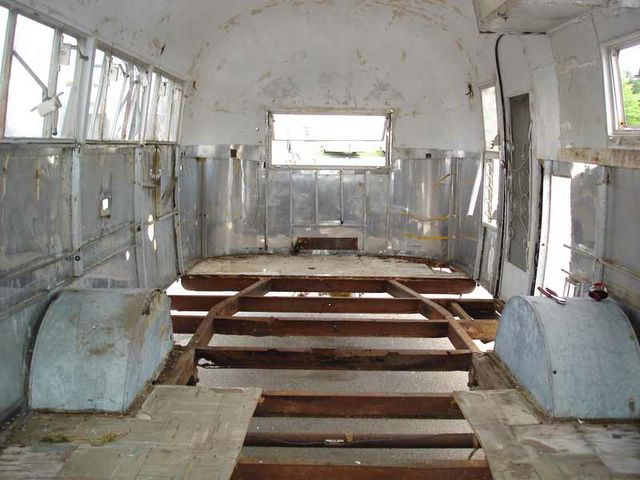
The photo above shows the new plywood floor spanning the restored chassis. For extra stability, construction adhesive is used where the floor touches the chassis. Back in the day, Wally's crews layed fiberglass insulation across the chassis before the plywood was layed. We aren't doing it that way. We'll be insulating from below before the belly pan is closed up.

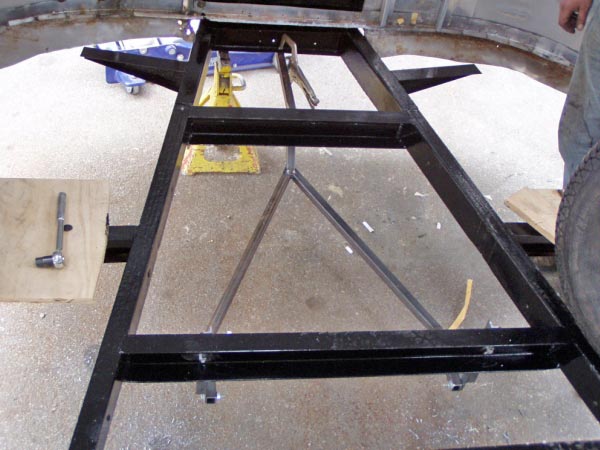
Notice the odd plywood seam pattern above. The edges of each piece of plywood need to all end up on frame members so they are supported. My chassis is modified to create a trapezoidal spare tire storage area under the floor. You can see it in post #25. This is also a good shot of how all plywood edges (and all undersides) are treated with wood preservative.

The fasteners of choice for the floor are elevator bolts and countersunk self-tapping machine screws. The elevator bolts are great because their wide flat heads are easy to countersink and could never pull through the plywood. They're secured with a hex nut underneath. The special self-tapping machine screws are almost as good. They have threads like bolts. They're used only where it would be impossible to reach the bottom end of a bolt to put on a hex nut. With the screws, the frame member is tapped so it acts like a nut and holds great. In a case like his, they aren't used much. But if you are doing a floor repair without removing the belly pan, they're your best friend.

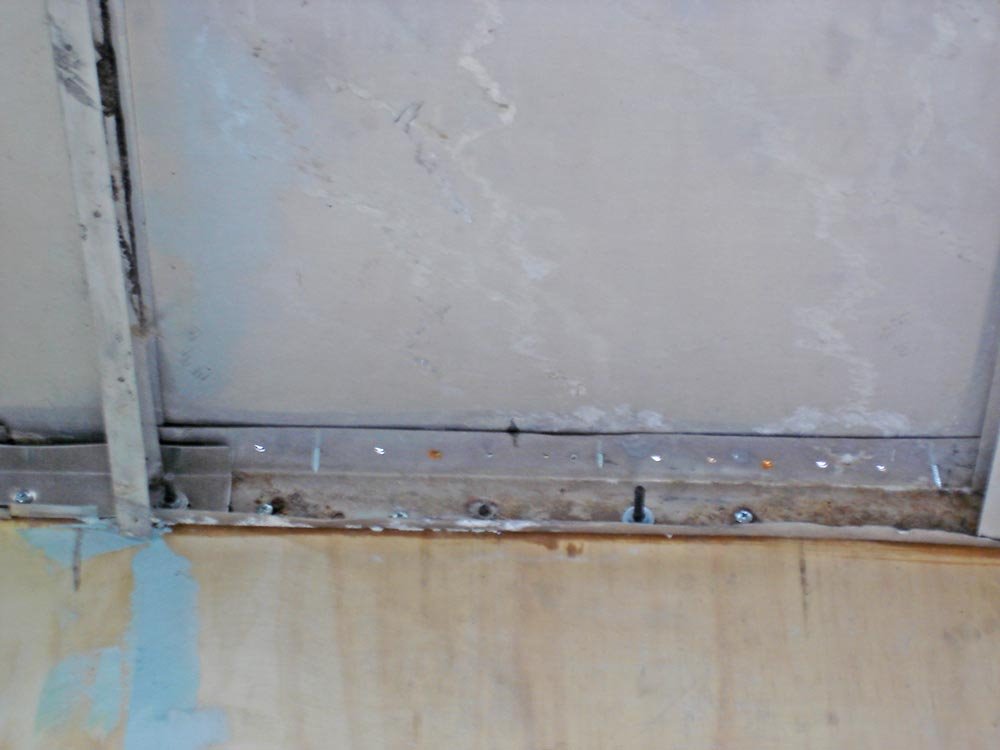
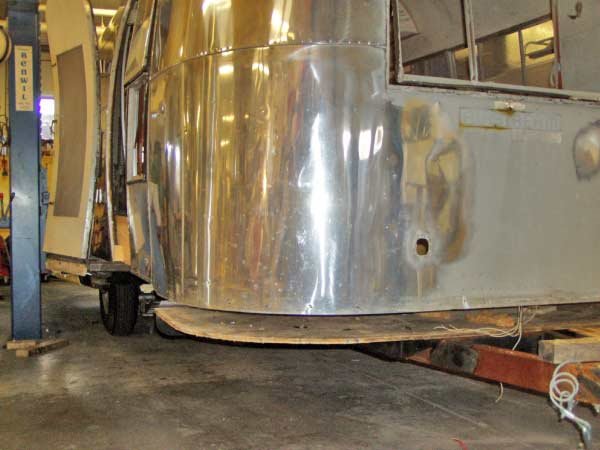
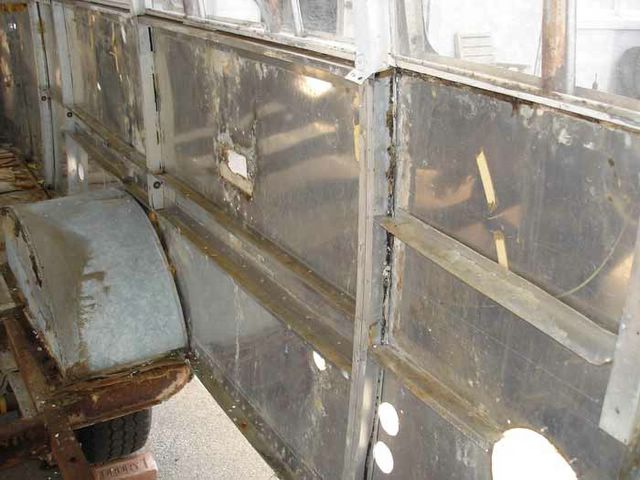
The shell has a U-channel inside the bottom edge of the wall all the way around. It's what secures the bottoms of the inner and outer skins of the trailer. Remove the lower segments of inner skin to get access to the U-channel. Screws and bolts are used to hold the U-channel to the floor and chassis. Here you can see the nuts on the ends of elevator bolts that were inserted through outriggers from below and then up through the channel. Sometimes, they go the other way. It doesn't much matter what fasteners you use here since they are hidden, but they should hold tight to the chassis as much as possible.
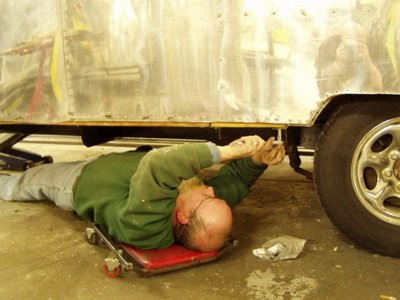
It can be tricky to get the nut on the bolt underneath. It's a two-person job. Above, Joe holds the socket wrench while Chris is working the top side.
For an Airstream to be structurally sound, the floor must be solid. But I'm not talking about the part of the floor you walk on. I'm talking about the part of the floor under the walls.
When an Airstream is built, the plywood is installed first and the shell is put on top. So when the plywood around the edges softens and disintegrates, it leaves a 5/8" gap between the bottom of the wall and the top of the chassis! To make matters worse, Wally's crews usually screwed the bottom of the wall into the plywood, but not all the way through the plywood and then into the chassis. So if your floor is soft under the walls, you have NOTHING holding the shell to the chassis in the area of the weak floor!
The shell must be bolted or screwed through solid floor and into the chassis. That's why floor repair is so hard on an Airstream...and is so often done insufficiently. Floor repair shortcuts that put new pieces of floor up to the wall, but not under it, may give you a firm floor, but they will not fix the underlying problem of a shell and chassis that are not fully secured.

Before the plywood and chassis are fastened securely together, the chassis will have a tendency to sag at the rear end. Working on a solid level surface and using temporary jacks to hold everything straight is essential until the floor is fully fastened down. Notice, also, the extra long chassis rails. Caravanner #1 came with a 1960s-style trunk bumper for the sewer hose rather than a simple 1950s bumper. I'm going to replicate that feature.
The photo above shows the new plywood floor spanning the restored chassis. For extra stability, construction adhesive is used where the floor touches the chassis. Back in the day, Wally's crews layed fiberglass insulation across the chassis before the plywood was layed. We aren't doing it that way. We'll be insulating from below before the belly pan is closed up.

Notice the odd plywood seam pattern above. The edges of each piece of plywood need to all end up on frame members so they are supported. My chassis is modified to create a trapezoidal spare tire storage area under the floor. You can see it in post #25. This is also a good shot of how all plywood edges (and all undersides) are treated with wood preservative.
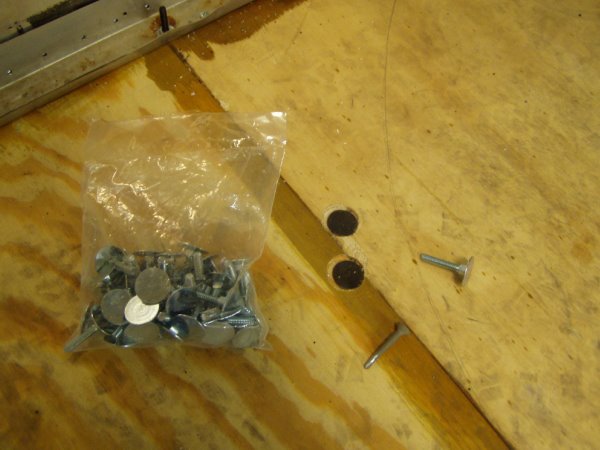
The fasteners of choice for the floor are elevator bolts and countersunk self-tapping machine screws. The elevator bolts are great because their wide flat heads are easy to countersink and could never pull through the plywood. They're secured with a hex nut underneath. The special self-tapping machine screws are almost as good. They have threads like bolts. They're used only where it would be impossible to reach the bottom end of a bolt to put on a hex nut. With the screws, the frame member is tapped so it acts like a nut and holds great. In a case like his, they aren't used much. But if you are doing a floor repair without removing the belly pan, they're your best friend.
The shell has a U-channel inside the bottom edge of the wall all the way around. It's what secures the bottoms of the inner and outer skins of the trailer. Remove the lower segments of inner skin to get access to the U-channel. Screws and bolts are used to hold the U-channel to the floor and chassis. Here you can see the nuts on the ends of elevator bolts that were inserted through outriggers from below and then up through the channel. Sometimes, they go the other way. It doesn't much matter what fasteners you use here since they are hidden, but they should hold tight to the chassis as much as possible.

It can be tricky to get the nut on the bolt underneath. It's a two-person job. Above, Joe holds the socket wrench while Chris is working the top side.
December 04, 2006
#36 - Swapping Shells
Here's something you'll probably never see again: Today, Colin's crew swapped the shells and chassis from two identical vintage Airstreams.
The ordeal was necessary because my #1 1956 Caravanner has a beautifully restored and customized chassis and my #2 1956 Caravanner has a much better shell. By marrying the #1 chassis and #2 shell, we'll get the best of both trailers. The photos below will show the general steps they followed.
First, Caravanner #1 was brought inside the shop...
 The shell of #1 is separated from its chassis and lifted high enough to clear the wheel wells.
 The good #1 chassis is pulled out from under its shell and set aside for the time being.
 Next, a spare old rusty chassis is pushed underneath. This one just happens to have belonged to movie star Matthew McConaughey. Colin's crew is working on Matthew's trailer simultaneously, and they built him a brand new chassis rather than restoring his original.
 Shell #1 is set down on Matthew's old chassis and minimally fastened so it doesn't fall off. They will be towed off to the back part of the lot where they will be used for parts for my trailer and others.
Now Caravanner #2 is brought inside...
 The #2 shell and chassis are separated.
 With the shell up in the air, the #2 chassis is pulled out from underneath. That #2 chassis is set aside for now. I will try to find a loving home for it since it is in restorable condition.
 Here, my restored chassis from #1 is brought back in the shop and pushed underneath the #2 shell.
 Finally, the #2 shell is carefully lowered down on the #1 chassis. Fortunately, it fits! With each 50s Airstreams being somewhat unique in construction, we couldn't be 100% sure until the moment of completion.
The next step will be to finish installing the plywood floor and then secure the #2 shell to it's "new" chassis.
The ordeal was necessary because my #1 1956 Caravanner has a beautifully restored and customized chassis and my #2 1956 Caravanner has a much better shell. By marrying the #1 chassis and #2 shell, we'll get the best of both trailers. The photos below will show the general steps they followed.
First, Caravanner #1 was brought inside the shop...
 The shell of #1 is separated from its chassis and lifted high enough to clear the wheel wells.
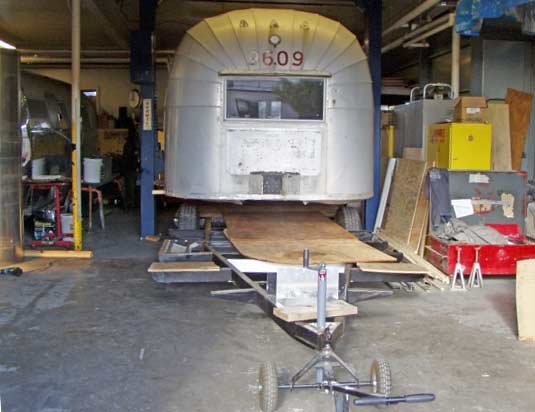 The good #1 chassis is pulled out from under its shell and set aside for the time being.
 Next, a spare old rusty chassis is pushed underneath. This one just happens to have belonged to movie star Matthew McConaughey. Colin's crew is working on Matthew's trailer simultaneously, and they built him a brand new chassis rather than restoring his original.
 Shell #1 is set down on Matthew's old chassis and minimally fastened so it doesn't fall off. They will be towed off to the back part of the lot where they will be used for parts for my trailer and others.
Now Caravanner #2 is brought inside...
 The #2 shell and chassis are separated.
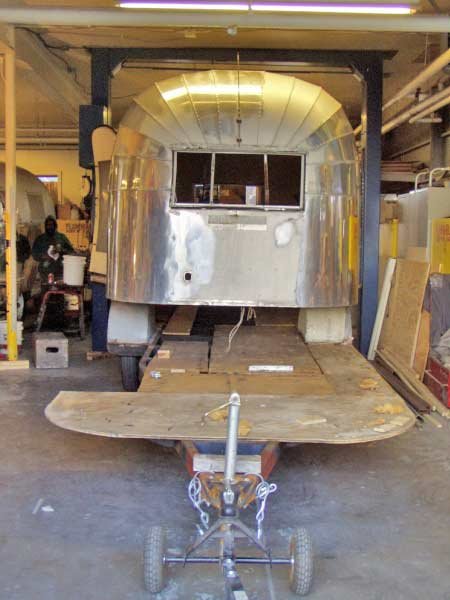 With the shell up in the air, the #2 chassis is pulled out from underneath. That #2 chassis is set aside for now. I will try to find a loving home for it since it is in restorable condition.
 Here, my restored chassis from #1 is brought back in the shop and pushed underneath the #2 shell.
 Finally, the #2 shell is carefully lowered down on the #1 chassis. Fortunately, it fits! With each 50s Airstreams being somewhat unique in construction, we couldn't be 100% sure until the moment of completion.
The next step will be to finish installing the plywood floor and then secure the #2 shell to it's "new" chassis.
December 03, 2006
#35 - Mexican Caravan
My #1 Caravanner came with a wonderful bumpersticker on its rusty bumper. It was a very old sticker from a campground in Oaxaca, Mexico.
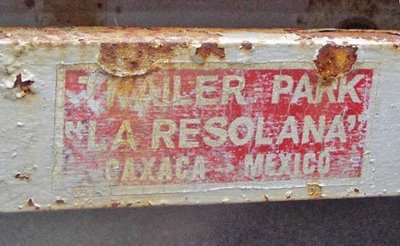
That tantalizing peek into my trailer's history is especially interesting since Wally Byam Caravans led a big caravan to Mexico--including Oaxaca--in 1956.

That tantalizing peek into my trailer's history is especially interesting since Wally Byam Caravans led a big caravan to Mexico--including Oaxaca--in 1956.
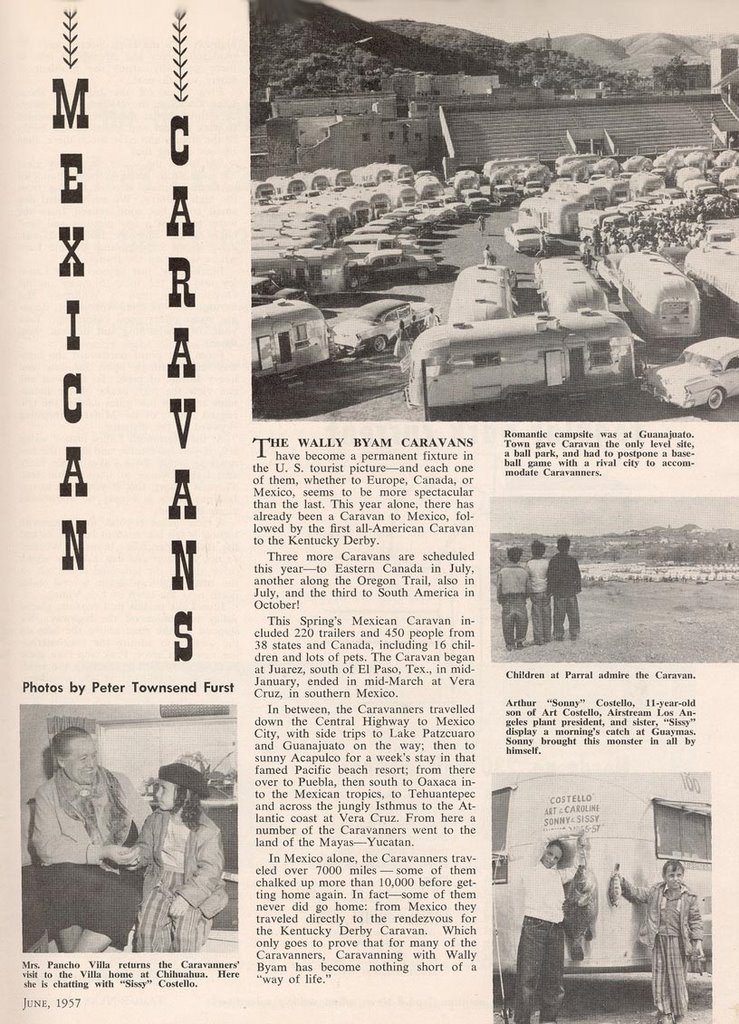
I wish I knew more of the story.
December 01, 2006
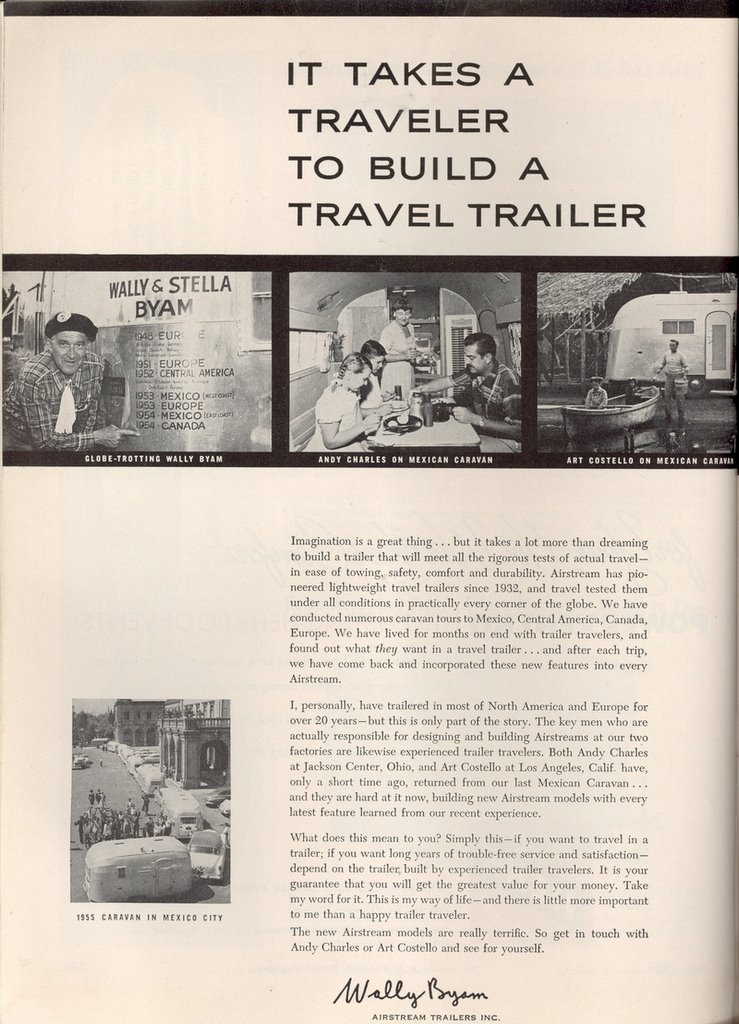
#34 - Wally Byam's Style
Vintage Airstream owners keep Wally Byam's legacy alive. But what is it that matters about Wally, now decades after his death? Someday, I'd like to read or write a good biography of Wally. Perhaps we know less than half the story.
No matter who Wally really was, we do know he was a master at public relations and marketing. He reminds me a little of Richard Branson of Virgin Inc. Like Sir Richard, Wally used his personality and his own lifestyle to promote his products and create a buzz and cool-factor that translated into sales of his travel trailers. But even more than an ingenious marketer, Wally seems to have been authentically committed to promoting a life of travel and adventure for all Americans. In his books, he pushes his readers to get out of the rocking chair and travel.
Here's a great ad from right around 1956 that demonstrates the way he wove together marketing and adventure. You might have to click on it more than once to make it the big enough to read.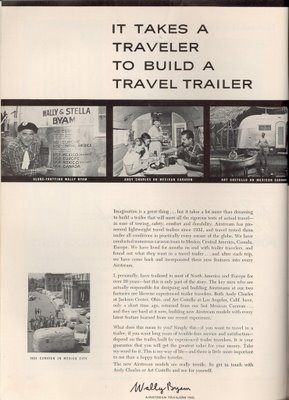
November 22, 2006
#33 - 1956 Original Features
I found a 1957 Caravanner brochure on the VAC site. I haven't found a 1956 Caravanner brochure, but the two models were similar. If anyone finds a '56 brochure, let me know.
Here's the most humorous section of the sales pitch for this trailer. Remember the shell is only 19' long:
"Bold, adventurous trailering awaits the young at heart in this excitingly new lightweight Airstream crusing model."Here are the standard features of the Caravanner. At this point, I'm planning to modify or remove features in red:
- Overall length - 22'
- Body length - 19'
- Overall weight - 2800 lbs.
- Hitch weight - 270 lbs.
- Choice of 3 interior wall colors.
- Comfortable divan with arms, converts to double bed. (I'm doing a dinette in front that converts to a bed.)
- 48" x 76" Airloom double bed. (I'm 78" tall.)
- Marine type flushing toilet, shower and vanity type lavatory.
- Electric water heater. (I'm going with gas.)
- Five foot drop-leaf table. (Our dinette will serve this purpose.)
- Butane radiant heater.
- Combination 5.8 cu ft ice-electric refrigerator with freezer. (The trailer came with the gas option below.)
- Double basin sink with swing faucet.
- Butane range, 3-burner, oven, broiler.
- 60" of Formica galley tops in kitchen.
- 116" of roof lockers, 32" wardrobe.
- Closet for household appliances.
- One 6 or 12 volt battery dome light. (I'll add a few.)
- Airstream's "Airliner" curtains. (I don't know what these looked like. Maybe I can recreate them.)
- Linoleum tiled floors. (Real Linoleum sheet instead of tiles.)
- 9 crank operated windows.
- 3 roof vents, power fan in center vent.
- Warp-proof hollow core cabinet doors.
- Touch control built-in step.
- Radio antenna
- Butane tank
- Imported "Sta-Closed" closet catches.
- Porch light.
- 12' awning rail.
- Waterproof 110 volt electrical outlet.
- Escape type rear window.
- Fiberglass insulation.
- Trunk compartment.
- Steel bumper.
- Shock absorbers.
- Electric brakes.
- Truck wheels 7.00x15 six-ply tires.
- Pressurized water system.
- 3.9 cu ft gas refrigerator.
- Septic tank for toilet.
- Gas water heater.
- Puncture proof tubes. (I'll be using tubeless.)
- 8-ply tires.
- Two butane tanks.
"...an extra roomy shower, a unique concealed wash bowl that converts into an attractive mirrored vanity and a hot water heater."If you've ever seen the convertible vanity, you'll agree it's very slick.
Here's the most humorous section of the sales pitch for this trailer. Remember the shell is only 19' long:
"This wide open, spacious one room trailer is transformed into a two room apartment by simple use of an ingenious folding door. This also provides privacy for bedroom, toilet, lavatory and shower in their rear locations while the front living room is in use."It then mentions my absolute favorite part of Caravanners:
"The 20 sq ft of area in the giant 'Panoram' window presents a kaleidoscopic view of all of outdoors, while flooding the living room with daylight and ventilation."
November 19, 2006
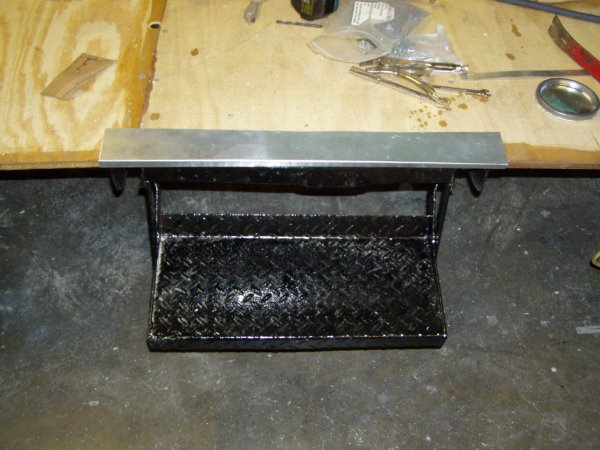
#32 - The Damn Step
The RV step is a deceptively complicated object. Besides tread style, and width, depth and drop dimensions, steps vary based on the way they latch closed and the way they mount. For instance, vintage Airstream steps use cut outs in the outriggers as tracks. Newer versions come with their own tracks on the sides.
#1 didn't come with an original step. It was an older replacement model. Colin and I have been arguing about that damn step since I bought #1. He pushed me to look for an original. I said I didn't care how it looked and a new one is cheap...a lot cheaper than having him fabricate something. I have to be cost-conscious someplace and a non-original step seems like a good place.
But Colin is a perfectionist and he had installed enough old and new steps to argue that a properly restored vintage Airstream step not only looks unique but also works better than a new replacement.
Ultimately, the argument ended when my #2 Caravanner showed up with a good original step. It has been cut out of #2 and made to fit just like it should on the #1 chassis. Colin wins.
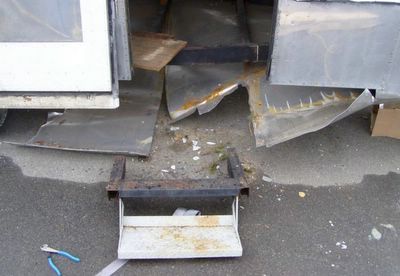
Original Step Cut from #2
 Step from #2 Restored and Installed on #1.
November 10, 2006
#31 - A Gold Mine!
As I had hoped, inside #2 is a gold mine of parts. Until now, I didn't know for sure because the previous owner had gutted the interior while they started the renovation. They threw it all back in loose when we picked it up. They promised it would be nearly complete, but I didn't believe it until it all came pouring out on the pavement when we got it back.
Inside were great original appliances, most of the original cabinets (stripped and sanded but not refinished), nearly all the window parts, original hubcaps, and more.
The propane fridge in the photo below is my favorite thing in the whole batch. It's an early Dometic gas-only fridge. The standard fridge in 1956 would have been a 110vac-only Marvel. Marvels are great looking fridges, but you have your fridge only when you are plugged in. Modern fridges go both ways, but they require a constant parasitic 12vdc draw on your battery to power the controls.
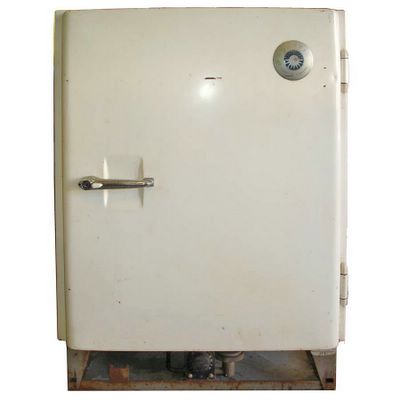
A Rare Original 1956 Dometic
Inside were great original appliances, most of the original cabinets (stripped and sanded but not refinished), nearly all the window parts, original hubcaps, and more.


The propane fridge in the photo below is my favorite thing in the whole batch. It's an early Dometic gas-only fridge. The standard fridge in 1956 would have been a 110vac-only Marvel. Marvels are great looking fridges, but you have your fridge only when you are plugged in. Modern fridges go both ways, but they require a constant parasitic 12vdc draw on your battery to power the controls.

A Rare Original 1956 Dometic
November 05, 2006
#30 - Are There "Restoration Ethics?"
For the record, the serial number for #1 is O-9003 and #2 is O-9045. I have great reverence for the history of vintage trailers. I see each of these as unique historic artifacts with stories to tell.
I'm always sad to see vintage trailers parted out. Every day in my job I talk to restorers who are looking for windows, doors, vents and other items that are simply not available anymore. As our hobby has grown, the overall value (not just $$ value) of an original exterior has gone way up. As our hobby continues to mature, the value of an original interior will become greater, too. I take all this very seriously--to the point of an ethical duty--while undertaking this restoration.
Less than 100 Caravanners were built in 1956, the first year Caravanners were made. It is somewhat wrong to reduce the surviving examples by 1. But there is so little left of my #1 that it wouldn't have been all that original when it was done, anyway. I have to think of it as saving one gorgeous example and using the spare parts to save a few others...like an organ donor.
Once the shell swap is finished, I'll need to rename them... referring to them as #1 and #2, or by their serial numbers will be confusing. Which trailer gets which serial number? I have already registered O-9003 and it is the one listed with the WBCCI... but doesn't the serial number stay with the shell?
October 31, 2006
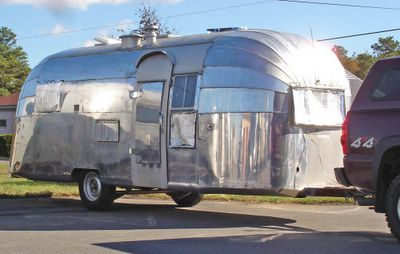
#29 - The Second Airstream Changes Everything
Yesterday, Rob Baker and Dick Perkins towed my #2 trailer from Rob's house to Colin's shop. Thanks guys.
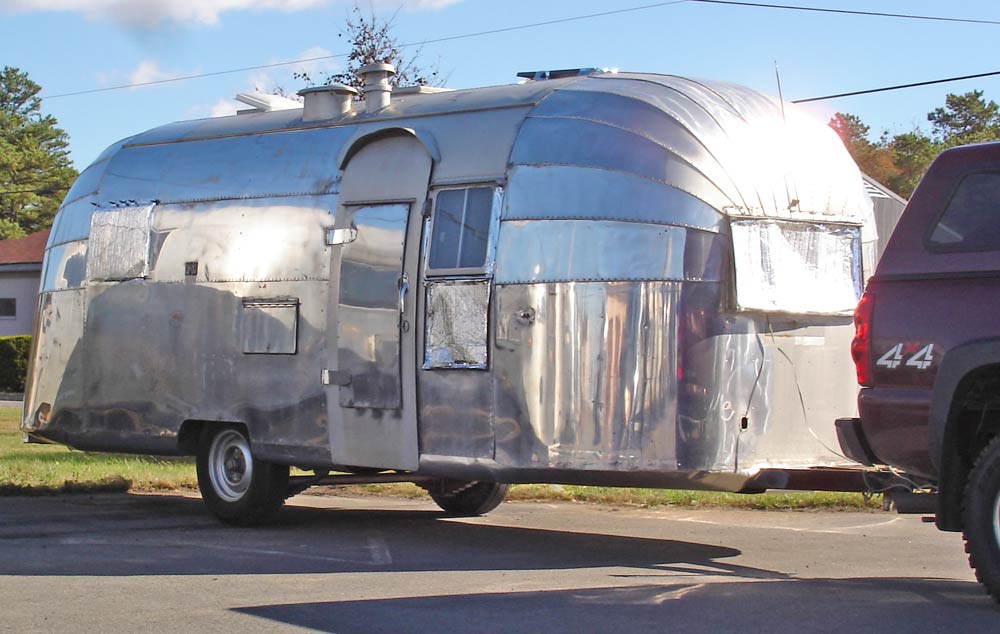
I got my first real look at my second 1956 Caravanner and am impressed. The tree damage was minimal. The front 14x14 roof vent was damaged where a branch went down through it. And there are a few very mild dents in the front end cap on the curb side to the right of the door. I own a bunch of extra vents and Colin says he can fix the dents in the end cap so that they are unnoticeable.
Click the Photo to See How Mild the Dent Is
Overall, the shell is nearly perfect. It's partially polished here and there, so I didn't really notice finer scratches, but there are no dents at all other than the little ones Colin will remove.
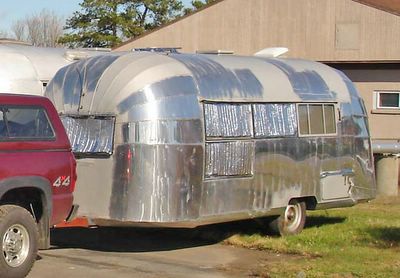
Don't Mind the Missing Windows. They're Inside.
Seeing that near perfect shell on #2 made it absolutely clear where I'm going with this project. I'm taking shell #2 as a whole and moving it to chassis #1. Chassis #1 has been fixed and modified by Colin and his guys to add space for a spare tire, a gray tank and mounting plates for a torsion axle. With shell #2 on top, it's going to be a beautiful and structurally strong trailer.
Chassis #2 and shell #1 will be tacked together temporarily to form an organ donor trailer. Shell #1 has so many problems that it would cost way more to fix it than it will to fix shell #2. Chassis #2 was repaired by the previous owner and some of what they did was great, but it would need a lot more work before would be properly restored.
Caravanner #2 came with all its interior parts (and some exterior parts) loose inside. The previous owners had gutted it and partially removed the window frames for restoration when they ran out of steam. When Rob picked it up in October, they threw everything inside and in the back of Rob's truck. They promise me it's all there in pieces and parts, but I won't know until I have a chance to unpack and inventory. Since my Caravanner #1 came with virtually no original interior, we'll use virtually every scrap from #2.
Overall, the acquisition of this second trailer has fundamentally changed the direction of my project. I originally thought of #2 as a parts trailer for #1. It's clear now that #1 will be the parts trailer for #2, instead. And the biggest part from #1 will be the chassis. It's too bad we didn't have #2 a few months sooner. We would have restored the #2 chassis and I wouldn't have needed #1 at all. But we've already restored and modified the chassis on #1, so we might as well use it with the more complete and restorable #2 shell and interior.
October 09, 2006
#28 - Picking Up Caravanner #2
Rob Baker lives in upstate NY and is continually on road trips for his work. He also has a passion for vintage trailers. Those two conditions lead to him finding and buying more old Airstreams than he really should. He has a blog about it called Sweet Sovereign. Take a look in our links section for a peek.
On October 7th, Rob picked up my Caravanner #2 in PA while he was coming home from a business trip. It will be at his house until late October when he has time to tow it to Colin's shop in upstate New York. I'll meet him there and we'll decide how to merge my two 1956 Airstream Caravanners.

Caravanner #2 At a Rest Stop On The Way Home
September 18, 2006
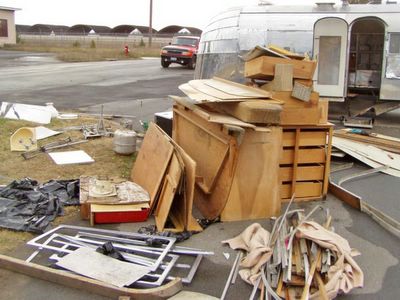
#27 - Buying a Parts Trailer
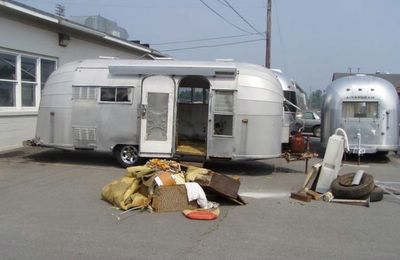
Today I acquired a second 1956 Airstream Caravanner. A tree fell on it in the middle of its restoration, so the owner was selling it for parts.
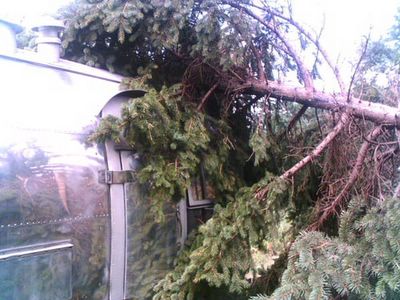
My Second 1956 Caravanner
It's in rough shape...gutted...but all the original cabinetry and appliances come with it. Remember I don't have any original cabinetry or appliances from #1.
I wasn't looking for a second trailer. But this one sort of fell out of the sky. How can I say "no" to a parts trailer?
Honestly, it's a bit of a moral dilemna for me since I hate to see any 1950s Airstreams taken off the road. I'm going to have to meditate on how best to proceed from here.
Rob Baker of Sweet Sovereign fame is retrieving the trailer for me the first week of October. Thanks, Rob.
September 12, 2006
#26 - Restored Tongue
Here you can see the great job Colin's crew did on the coupler. Remember the frame was so bad in this spot that he had to cut it off and weld new steel on first. Then they cleaned up the old coupler and welded it back on.
Look at Post #5 to see what it used to look like.
New Tongue Framing

Restored Coupler
One thing missing in the photo above is a jack for the tongue. I could have reused the original, but they're so inexpensive that it's better to just replace it with a new one. I'm using a Fulton top wind A-frame jack. It looks a lot like the original.

Fulton Jack
In all the restored chassis photos you can see the fresh paint. All the chassis' old steel is painted with POR-15, a rust-neutralizing paint.
Regular Rust-o-leum is used on the new steel. Any areas that will be visible or receive UV exposure will be painted again later with silver Rust-o-leum.
Look at Post #5 to see what it used to look like.

New Tongue Framing
Restored Coupler
One thing missing in the photo above is a jack for the tongue. I could have reused the original, but they're so inexpensive that it's better to just replace it with a new one. I'm using a Fulton top wind A-frame jack. It looks a lot like the original.

Fulton Jack
In all the restored chassis photos you can see the fresh paint. All the chassis' old steel is painted with POR-15, a rust-neutralizing paint.
Regular Rust-o-leum is used on the new steel. Any areas that will be visible or receive UV exposure will be painted again later with silver Rust-o-leum.
September 06, 2006
#25 - Spare Tire Carrier
Some people put it on the back bumper. I've never liked that because it takes away from the streamlined look. Also, it gets in the way if you have a storage compartment bumper.
Some people put it behind the propane tanks. I did that with my '67 Caravel, but it looked like clutter to me. Plus, the Caravanner has a battery (or storage) box up front so there's no room.
For one or two model years, Airstream created a wide storage compartment on the side. You slide it in from the outside and it rests in one of your base cabinets. Cool, but cabinet space is precious.

In my book, there's only one place to put the spare: under the trailer. It's a little tricky. You can see in the photo above that it requires another chassis modification near the front in the A frame section.
Having it underneath does mean getting under the trailer when you have a blowout, but it's in the front area so the clearance will always be good. The belly skin in this area will wrap up around the framing and directly up against the floor so there will be no room for insulation. The other disadvantage to this method is that the tire hangs down 5" below the plane of the belly skin. That bothers me a little, but we may mitigate part of that problem by raising the trailer an inch or so with the new axle.

Shown With Tire in Place
Some people put it behind the propane tanks. I did that with my '67 Caravel, but it looked like clutter to me. Plus, the Caravanner has a battery (or storage) box up front so there's no room.
For one or two model years, Airstream created a wide storage compartment on the side. You slide it in from the outside and it rests in one of your base cabinets. Cool, but cabinet space is precious.
In my book, there's only one place to put the spare: under the trailer. It's a little tricky. You can see in the photo above that it requires another chassis modification near the front in the A frame section.
Having it underneath does mean getting under the trailer when you have a blowout, but it's in the front area so the clearance will always be good. The belly skin in this area will wrap up around the framing and directly up against the floor so there will be no room for insulation. The other disadvantage to this method is that the tire hangs down 5" below the plane of the belly skin. That bothers me a little, but we may mitigate part of that problem by raising the trailer an inch or so with the new axle.

Shown With Tire in Place
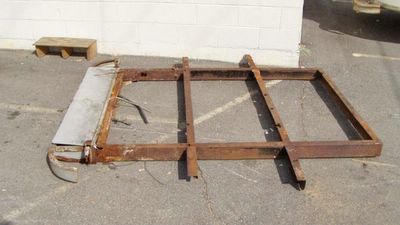
#24 - Adding a Gray Tank
Old trailers had waste (black water) tanks under the toilet, but no wash water (gray water) tanks. The wash water just dumped straight on the ground. Today, it's illegal to do that in most states, and very few campgrounds would put up with you if you tried it. New trailers all have separate gray tanks.
Below you can see the frame modification we made to accomodate a big gray tank under the floor. It will sit between the wheels. The space is 50" X 35" X 3 3/4". That equals 6532 cubic inches, or room for a 28 gallon gray tank. For comparison, new Airstream trailers up through 23-ft long have 21 gallon gray tanks and black tanks of 18 to 21 gallons. They have fresh water tanks as big as 30 gallons.
Frame Rung Moved Forward
Below you can see the frame modification we made to accomodate a big gray tank under the floor. It will sit between the wheels. The space is 50" X 35" X 3 3/4". That equals 6532 cubic inches, or room for a 28 gallon gray tank. For comparison, new Airstream trailers up through 23-ft long have 21 gallon gray tanks and black tanks of 18 to 21 gallons. They have fresh water tanks as big as 30 gallons.

Frame Rung Moved Forward
September 01, 2006
#23 - Frame Repair
Now that the frame repairs are underway, we can see additional fixes that will be needed. Thankfully, most all the outriggers are in good shape and can be reused. However, the rungs on the ladder frame were pretty bad. Several were replaced.

New Rungs Among the Old
As we planned, the back 1/3 of the frame was just cut off and replaced as a whole.
Back End of Chasis Frame.
One of the innovative techniques Colin's shop uses to strengthen old frames is to slide new 1.5" x 3" x .125" thick box channel inside the old 2" x 4" x .100" thick frame rails and then plug weld them in place. This strengthens the entire frame and acts as a great splint between welded-together sections. Because the old frame rails take a turn to form the A frame towards the tongue, Colin slides rails in from both the front and the back.
You can see in the photo below how they have used short pieces of steel bar to block the smaller inside channel in place. Normally, they don't use rebar, but it worked well here in the tongue. Normally, they drill a few holes on one side of the old channel and then put bolts through to push the new inner channel all the way to one side of the old channel. They drill more holes on the other side and plug weld through the holes where the two channels are touching. This locks the box channel in place permanently.
When finished, the frame is stronger than it was originally. It will be somewhat heavier, too, but Colin assures me he won't do anything that will prevent me from staying under 3000 pounds dry weight. (Right, Colin?)
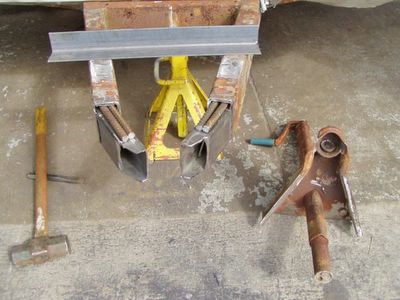
Support Inside Framing. Original Coupler on Ground.
New Rungs Among the Old
As we planned, the back 1/3 of the frame was just cut off and replaced as a whole.

Back End of Chasis Frame.
One of the innovative techniques Colin's shop uses to strengthen old frames is to slide new 1.5" x 3" x .125" thick box channel inside the old 2" x 4" x .100" thick frame rails and then plug weld them in place. This strengthens the entire frame and acts as a great splint between welded-together sections. Because the old frame rails take a turn to form the A frame towards the tongue, Colin slides rails in from both the front and the back.
You can see in the photo below how they have used short pieces of steel bar to block the smaller inside channel in place. Normally, they don't use rebar, but it worked well here in the tongue. Normally, they drill a few holes on one side of the old channel and then put bolts through to push the new inner channel all the way to one side of the old channel. They drill more holes on the other side and plug weld through the holes where the two channels are touching. This locks the box channel in place permanently.
When finished, the frame is stronger than it was originally. It will be somewhat heavier, too, but Colin assures me he won't do anything that will prevent me from staying under 3000 pounds dry weight. (Right, Colin?)

Support Inside Framing. Original Coupler on Ground.
August 18, 2006
#22 - What Kind of Aluminum is That?
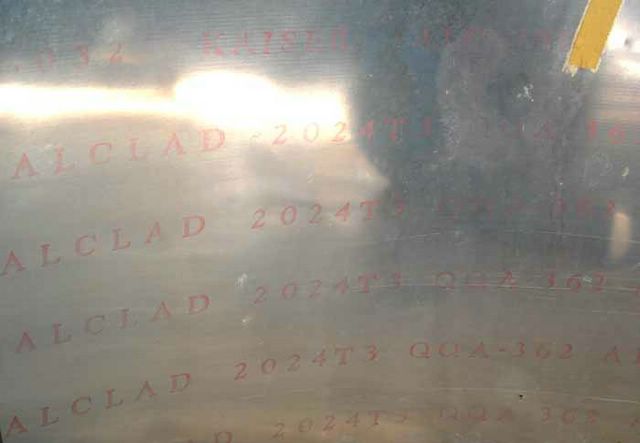
I often get asked what kind of aluminum was used on vintage Airstreams. The answer is stenciled on the back of most of the original exterior skin segments on my 1956 Caravanner:
KAISER ALCLAD 2024-T3 QQ-A-362.
Kaiser is the manufacturer of the aluminum sheet. Alclad means the 2024 alloy has a thin layer of 99% pure aluminum cladding on both sides. T3 is the temper of the alloy. QQ-A-362 is some sort of federal standard specification for corrosion resistance, or something. I believe the QQ system has been replaced by ASTM numbers. Gotta look that one up!
Altough it isn't marked on the sheet, I believe all Airstream skins through the 1960s and probably even the 1970s were .032" thick.
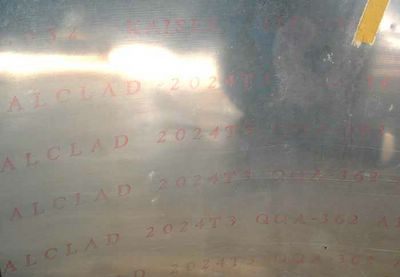
Back of Aluminum Sheet
If you ever wondered what other metals are in 2024 aluminum alloy, (you need to spend less time thinking about Airstreams and) here's your answer as percentages of the total weight:
Kaiser is the manufacturer of the aluminum sheet. Alclad means the 2024 alloy has a thin layer of 99% pure aluminum cladding on both sides. T3 is the temper of the alloy. QQ-A-362 is some sort of federal standard specification for corrosion resistance, or something. I believe the QQ system has been replaced by ASTM numbers. Gotta look that one up!
Altough it isn't marked on the sheet, I believe all Airstream skins through the 1960s and probably even the 1970s were .032" thick.
Back of Aluminum Sheet
If you ever wondered what other metals are in 2024 aluminum alloy, (you need to spend less time thinking about Airstreams and) here's your answer as percentages of the total weight:
- Aluminum = 90.7 - 94.7%
- Copper = 3.8 - 4.9%
- Magnesium = 1.2 - 1.8%
- Manganese = 0.3 - 0.9%
- Iron = Max 0.5%
- Silicon = Max 0.5%
- Zinc = Max 0.25%
- Titanium = Max 0.15%
- Chromium = Max 0.1%
- All Others = Max 0.15%
August 14, 2006
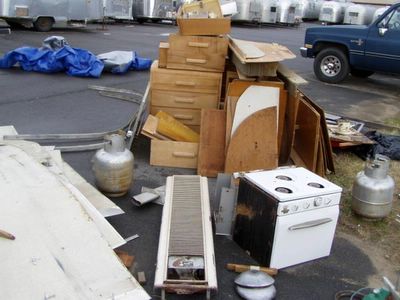
#21 - Appliance Gallery
You can see from this collection of appliance and tank photos why I say there's almost nothing worth saving. I briefly thought about trying to bring that fridge back to life...but then I smartened up.
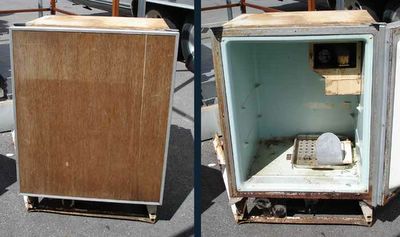
Outside and Inside of 1960s Fridge

1960s Stove
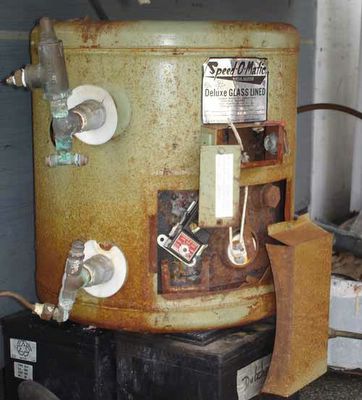
Deluxe Glass Lined Speed-O-Matic Water Heater
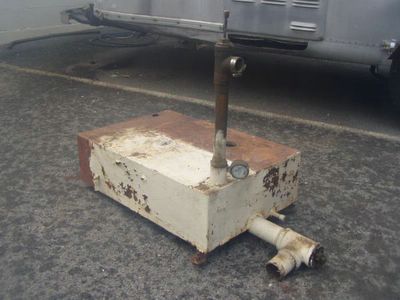
Extreme Black Tank with Pressure Gauge!

The gas tank in the scrap pile was used as a gray tank!

Outside and Inside of 1960s Fridge
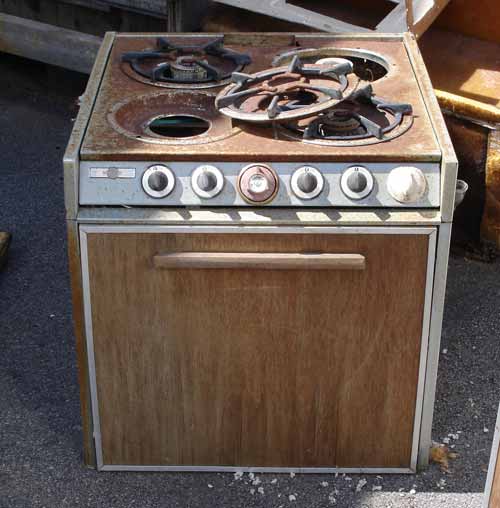
1960s Stove
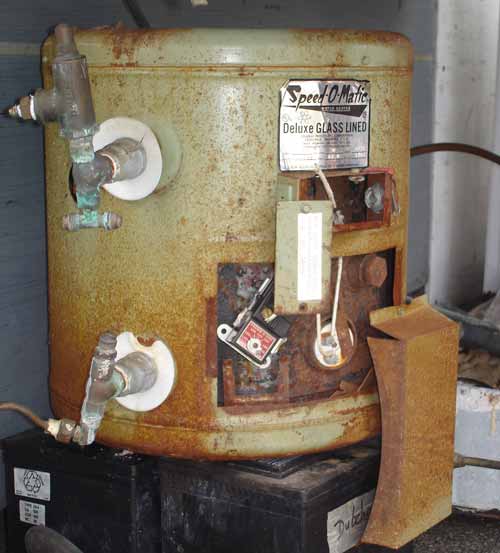
Deluxe Glass Lined Speed-O-Matic Water Heater

Extreme Black Tank with Pressure Gauge!
The gas tank in the scrap pile was used as a gray tank!
August 12, 2006
#20 - Assessing Frame Rust
A close inspection of our chassis yielded some expensive news: major repair will be necessary.
With a 50-year-old trailer I expected to find significant rust on the steel frame. I was hoping we'd need a few patches, a few repaired welds, a good wire brushing and some rust-neutralizing paint. Unfortunately, we've got bigger problems.
While none of the frame members have separated from each other, we can see rust-through in both the C-channel cross members and (more significantly) in the box-channel rails running the length of the trailer. The back three feet of the frame are really bad. In addition to rust perforation, the last cross member was drilled several times for various plumbing and electrical needs.
You may have to click on the photos below to see the detail.

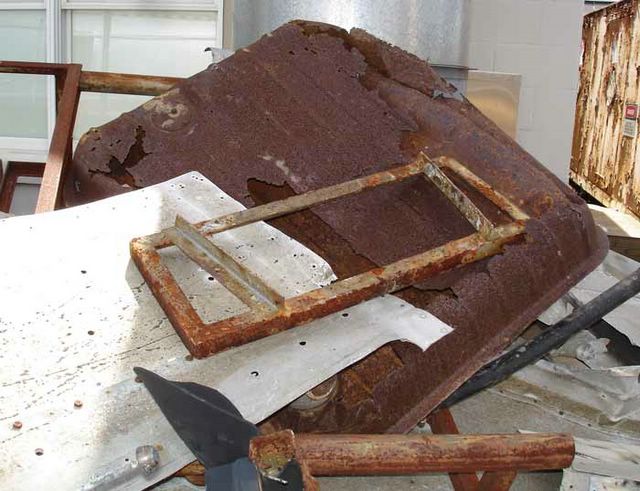
Center Section of Chassis has Rusty, but Repairable, Cross Sections

Rear Section of Chassis is So Bad it Must be Replaced
Replacing a cross member can be done by simply cutting the old one out and welding a new one in its place. The same is true for outriggers. But replacing the main rails is really impossible without effectively building a new frame.
After talking it over with Colin, I decided not to have a new frame built from scratch. Instead, we'll have Colin's welder use a combination of techniques to repair and strengthen the original chassis. It may not be as pretty as a new frame, but it will be just as strong and save a lot of money in time and materials.
Here's what Colin's crew will do:
With a 50-year-old trailer I expected to find significant rust on the steel frame. I was hoping we'd need a few patches, a few repaired welds, a good wire brushing and some rust-neutralizing paint. Unfortunately, we've got bigger problems.
While none of the frame members have separated from each other, we can see rust-through in both the C-channel cross members and (more significantly) in the box-channel rails running the length of the trailer. The back three feet of the frame are really bad. In addition to rust perforation, the last cross member was drilled several times for various plumbing and electrical needs.
You may have to click on the photos below to see the detail.
Center Section of Chassis has Rusty, but Repairable, Cross Sections

Rear Section of Chassis is So Bad it Must be Replaced
Replacing a cross member can be done by simply cutting the old one out and welding a new one in its place. The same is true for outriggers. But replacing the main rails is really impossible without effectively building a new frame.
After talking it over with Colin, I decided not to have a new frame built from scratch. Instead, we'll have Colin's welder use a combination of techniques to repair and strengthen the original chassis. It may not be as pretty as a new frame, but it will be just as strong and save a lot of money in time and materials.
Here's what Colin's crew will do:
- Cut off and entirely replace the last few feet of the chassis that are the worst. We'll have all new rails, outriggers and cross members in the back.
- Replace a couple cross members in the middle of the trailer that are beyond patching.
- Patch rust holes in all the other cross members and main frame rails that are generally good enough to save. The rust will be cut out and new steel welded in place.
- Slide new box channel inside the original box channel rails to strengthen them significantly.
August 11, 2006
#19 - Completely Gutted
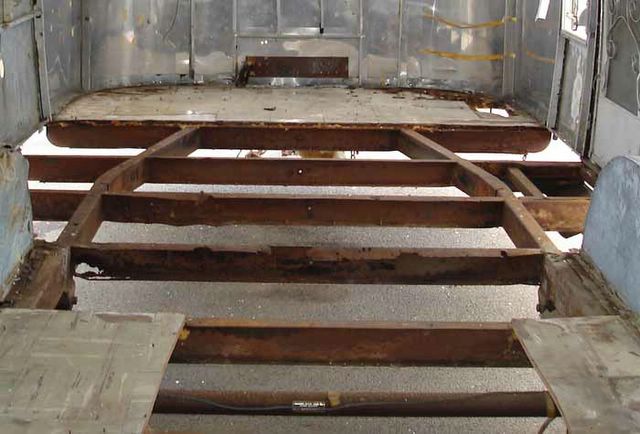
Yesterday, I drove to Plattsburgh to finally get a look at the results of Santos' and Colin's gut job. Almost everything but the metal is gone. As Colin said with a wink, "It's ready to be towed to the scrap yard." A little floor was left for now to provide some structural rigidity to the shell/chassis during restoration.
In gutting it, Santos filled two dumpsters plus he collected at least a dumpster full of scrap metal. You can see in the photos below how completely they gutted it. The aluminum sheets from the lower inside walls have been saved for reuse where possible.
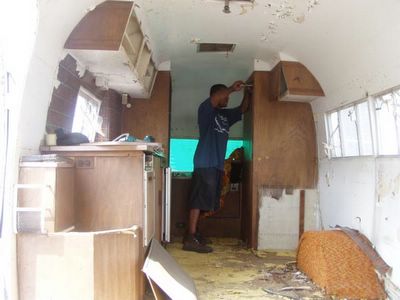
Here's Colin standing inside the shell. You can see the holes where the Bargman No. 6 taillights were temporarily removed. Eventually the upper cabinets and the rest of the inside walls have to come out so new wiring and insulation can be installed. That will happen after the frame is repaired and the new floor is installed.

Looking Towards Rear

Looking Towards Front

Rear Curb Side

Street Side
In gutting it, Santos filled two dumpsters plus he collected at least a dumpster full of scrap metal. You can see in the photos below how completely they gutted it. The aluminum sheets from the lower inside walls have been saved for reuse where possible.
Here's Colin standing inside the shell. You can see the holes where the Bargman No. 6 taillights were temporarily removed. Eventually the upper cabinets and the rest of the inside walls have to come out so new wiring and insulation can be installed. That will happen after the frame is repaired and the new floor is installed.
Looking Towards Rear
Looking Towards Front

Rear Curb Side
Street Side
July 29, 2006
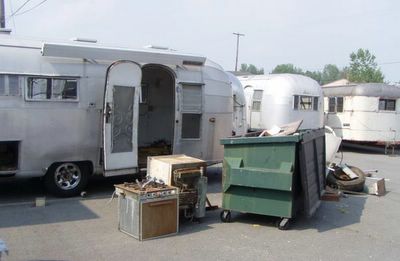
#18 - Work Begins!
Back in December (Post #7), I said we'd start work on the Caravanner in the late winter or early spring. We're a little behind schedule, but today Colin's staff started the rebuild. The first few days of work are demolition. We have to get a good look at the steel chassis frame to know where to start the restoration, so Colin's crew has to remove the floor.
Everything near the floor is coming out of the inside. And almost everything is going in the dumpster. I wish we could save and re-use cabinets or something, but it's all bad. The only thing we'll save from the inside are the aluminum overhead lockers.
Santos got to do most of the dirty work. He removed the appliances, plumbing, exposed electrical, various vents, base cabinets, and lots of miscellaneous relics...
Santos Removing Cabinets
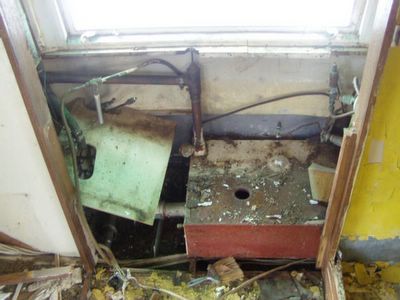
Black Tank Mess in Rear Center
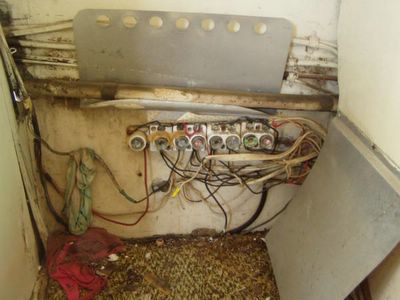
Fuse Panel with 8 Circuits
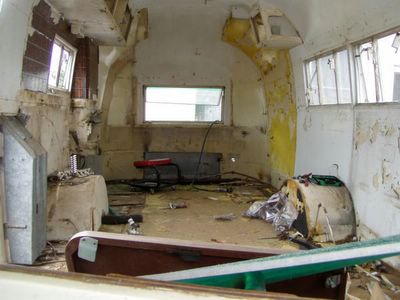
Partially Gutted

Faux Brick Must Go
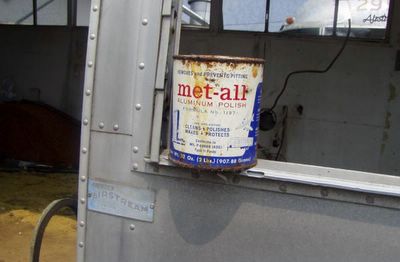
Vintage Aluminum Polish Found in the Rubble
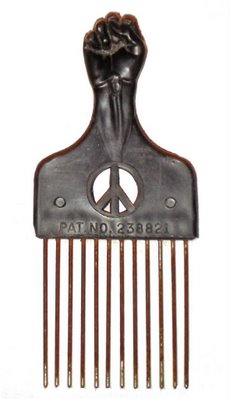 A Black Power Pick! This One's A Keeper.
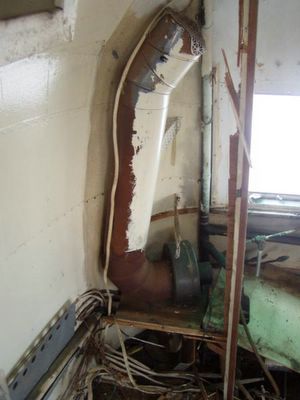
Giant Exhaust Duct
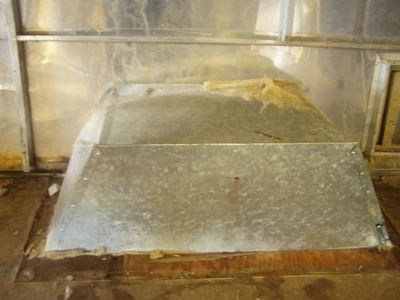
Hey! Something Worth Saving: A Nice Galvanized Wheel Well
Everything near the floor is coming out of the inside. And almost everything is going in the dumpster. I wish we could save and re-use cabinets or something, but it's all bad. The only thing we'll save from the inside are the aluminum overhead lockers.


Santos got to do most of the dirty work. He removed the appliances, plumbing, exposed electrical, various vents, base cabinets, and lots of miscellaneous relics...

Santos Removing Cabinets

Black Tank Mess in Rear Center

Fuse Panel with 8 Circuits
Partially Gutted
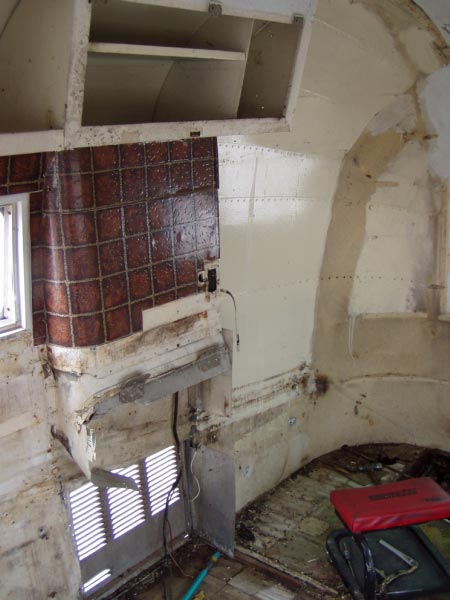
Faux Brick Must Go

Vintage Aluminum Polish Found in the Rubble
 A Black Power Pick! This One's A Keeper.
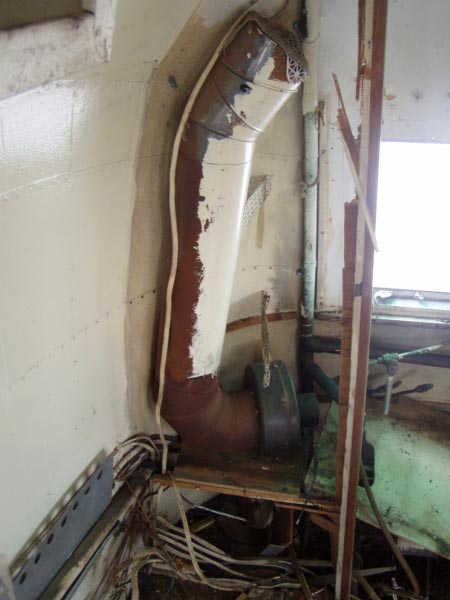
Giant Exhaust Duct

Hey! Something Worth Saving: A Nice Galvanized Wheel Well
Subscribe to:
Posts (Atom)

